Thursday, December 26, 2013

Super Hero Dress Up Capes

At one point in time, every child has tied a blanket around their neck and pretended to wear a cape. My nieces are no exception to this childhood practice. I decided to make them capes for Christmas, with their own super-girl initials!

You can make these with or without the applique. Without the applique they are pretty simple and quick to make. 

These are a variation I made based on a She-Ra cape that I made for a friend for Halloween. You can make this cape for adults as well. I opted to use Velcro for the neck so that the cape would rip off if it ever got caught on anything. 

Supplies:
Fabric of your choice, size will vary
Matching thread
Bias tape, binding or matching/contrasting fabric for the collar (your choice)

First take measurements. I measured from the neck to the back of the knees and the around the neck.

If you are using fleece or another non-fraying material you can use the exact measurements, if you are using something that will fray, be sure to add 1" to the width and 0.5" to the length to allow for a hem.

Decide how full you want your cape to be, I took the neck measurements and doubled it (and then added a couple more inches) The neck was 11" and my width was about 24".

Cut the material for the measurements you need. Hem around the sides and bottom (if needed), you can leave the top raw.

If you are adding an applique. Add it now. 

Sew a basting stitch along the top of the cape and gather the material until it is about 1" shorter than the neck measurement. 

Collar:
You go several different directions for the collar. You can get double fold bias tape which is already folded and pressed and ready to go for you. This is wonderful stuff! if you are making this cape for an adult you can even leave several inches on each end, sew right along the edge and you have a tie closure. Like I did in this cape:
Not the greatest picture, sorry. I would suggest getting wide bias tape as I had very narrow bias tape and it was a PAIN to cram all of the gathering into the fold and make it look nice. It was my first cape, and it didn't look very pretty if you looked too close... Luckily, SheRa has long hair!

You can also use blanket binding or make your own binding like it did. I wanted the binding to match the applique on the back, so I had to make my own.


You will cut a long, narrow strip for the collar. Take the neck measurement and add 5", this will allow for overlap for the velcro. I choose to make it 5" wide to make the collar wider to allow for room to attach the velcro. This will be folded several times so the collar will only end up being about 1.5"
 Iron the strip in half, lengthwise.
 unfold it and fold each side in 1/2" and press.
Trim a tiny triangle off each corner.
Before folding it in half (lengthwise again), fold the short end over 1/4" then over again another 1/4", press.
Fold it in half and pin it closed at the end to hold all of folds in place until you sew.
 Find the middle of the gathered cape and collar. Line them up.
Put top of cape into collar, pin everything together. Start at a top corner, sew down along the short end, turn and sew along the open edge of the collar, turn and sew up the other short end.
The last thing to do is to add velcro, and you're done!

No actions shots yet because these are still wrapped, under the tree waiting for two little super heroes to open them! :)

Thrifty Crafting

I grew up with a thrifty Mom, so I come by my cheap -err- thriftiness naturally. We were taught how to save money on everything, cut corners, reuse, shop sales and clearance, you name it! As a kid, I despised it, I swore when I grew up I wouldn't be cheap. But as I grew up and had to spend my own, hard earned money, I realized that I worked hard for my money, so why would I not want to stretch it as far as I could? I'm a big couponer, I shop sales, our clothes are second hand, or straight off the clearance rack. Our budget is tight, but I make it work.

Even my craftiness is fueled by my desire to save money. When I see something cute, that is fairly simple to make, I think, "why would I pay for that when I can make it for half the price!?" My first craft project, as an adult, was making my own Boppy-style pillow. It was only a half success, but that opened the door for crafts galore.

When my daughter started growing hair, those little alligator clip hair bows became popular, being the thrifter that I am, I made her one in every color. I even made hundreds more and sold them at a local consignment store to recoup the cost of the supplies, and when those costs were recouped... I bought the kids clothes at the consignment store. For several years those bows kept my kids clothed!

So, after years of being thrifty and a crafter, I've come up with a list of hints to craft on a budget!

1. Know your prices. After spending some time in craft stores you start to know what prices are for the items you buy often. Don't be fooled by "sale" prices that aren't really deals. Also pay attention to price/yard. Sometimes, what seems like a good price for ribbon, may just be short, overpriced ribbon on a big spool.

2. Shop around. Before I go shopping I take a quick look online and see what I can find an item for online, I always consider the price of shipping as part of the price. Then I head to stores and try to beat that price. If there are several craft stores in your area, check out prices at all of them. As much as I dislike Walmart, they have a fairly good craft section, and they usually have better prices than some of the bigger craft stores.

3. Use COUPONS! Hobby Lobby, Michael's, and Jo Ann's all offer coupons on a regular basis, all 3 stores have apps for your smart phone, they also email and mail out coupons and offer coupons on their website. I never find myself lacking for coupons. Michael's and Jo Ann's will both accept competitors coupons, Hobby Lobby does not. Also, get familiar with each retailers coupon policy. For all stores, % off a single item coupons can not be used on sale or clearance items. Jo Ann's will allow you to use more than one coupon per transaction and they will also allow you to use a % off one item with a % off entire order. For this reason, among many others, Jo Ann's is my favorite, and my go-to store for most of my crafting needs.

Coupon Policies:
Micheal's
Jo Ann's
Hobby Lobby

4. Stock up when the price is right. If you find fabric for dirt cheap, but don't have a project for it: Buy it! If you are buying supplies for an project and you find a super deal, stock up! I don't know how many projects I've been able to complete without a trip to the store because I've stocked my craft room, slowly, over the past few years.

Also get familiar with the remnant/end of bolt bin at your craft store. When they come to the end of a bolt, if there is less than a yard left, they offer whats left at a super discount. Also if there is less than a yard left when they are cutting your material, ask them if you can buy it as a remnant.

5. Organize. Stocking up does you no good if you aren't organized. If you can't find the supplies you have stocked up, then they will be useless. I am lucky enough to have a designated craft space. I call it my craft room, but really it's just a corner of the basement that has been partitioned off, just for me. I have lots of shelves, bins, baskets, containers, labels etc.... I try hard to stay organized, but I often have several crafts going on at once and I find myself in the middle of a mess, searching for one specific item.

If you don't have a designated space for crafting, buy a few big plastic bins, keep your supplies organized in there. I spent several years crafting like this. Whenever I had the urge to craft I would pull the bins out and everything would be in one spot, right at my fingertips.

6. Save your scraps. I have a scrap drawer. Anything over 5" X 5" or something similar in measurement gets put in there. I find they come in handy a lot.

7. Up-cycle. I save old clothes, towels, sheets, t shirts, knits, button down dress shirts, etc. If they have minor flaws that make them unwearable or unusable there is still a lot of valuable material that can be used for other projects. There are a lot of good tutorials online for ways to up-cycle old clothes.

8. Use the internet. Do extensive internet searches for every project. Even if you don't find exactly what you are looking for, you'll find several different ideas to help you come up with the most efficient method for your project. Most of my projects are a combination of several different online ideas.

Those are my tips! If you have any to add feel free to leave a comment below!

Monday, December 23, 2013

From Bookcase to Barbie house!

I wanted nothing more than to give Emily a Barbie Dreamhouse for Christmas. But even that one present would have exceeded our Christmas budget for her. So I got creative!

She had this bookcase in her room, the shelves were heaped with junk. She took little care in keeping the shelves organized and they were just a mess. One day I went on a pretend rampage, and emptied the shelves off, organizing the "junk" into piles to keep, put away, throw away etc... When I was done, she no longer needed the shelves, so I took them down to the basement and got to work!

This was an ongoing project that spanned several months, but I'm IN LOVE with the results!

This was a super old, pressed board book shelf. We got it used, 10+ years ago. It was still sturdy, but  really ugly! I gave the exterior a good sanding and a couple coats of spray paint primer. Then I gave it another couple coats of "mocha" colored chalkboard paint.


I used scrapbook paper for the wall paper and mod podge to apply it. The flooring is faux wood linoleum squares, purchased from Home Depot. for flooring and wallpaper: $7.80!
The window is also scrapbook paper, cardstock trim, with fabric and ribbon hot glued for the curtains. You can see the "chair rail" in the back is simple ribbon as well.
I picked up this decorative mirror at Dollar Tree and glued fur around it. Notice the "crown molding" on the top! (only this level got crown molding, the other levels were too uneven)
The TV and fireplace were printed up, cut out and mod-podged right onto the wall. The area rug was some silky, furry, fabric I had. I cut out a square, did a zig zag stitch around the edges to keep it from fraying/shedding, then hot glued anti skid rug underlay to the bottom. The clock is another modge-podge job. I found a wood pendant at a craft store, spray painted it, and modge-podged it on. You can't tell in this picture, but I also Photoshopped Emily's name onto the clock face before I printed it up.

Once it was all assembled it was time for the fun part... Decorating!
 I think I love the table the most! It was a decorative mirror, glued to a candlestick holder, both from Dollar Tree! $2 Barbie table! The stools are made from decorative gift boxes, also from the dollar tree. I "upholstered" the top and duct taped the bottom. The bench in the back was confiscated from Emily's Barbie collection.
I sat and waited for weeks for inspiration to hit me for how to make a kitchen.... finally it hit me! Someone was selling a bunch of used Barbie furniture online for $10, Kitchen and Fridge included! I was not at all disappointed to not have to make my own!
 The sectional couch was made out of duct tape and cereal boxes. I didn't really follow any type of pattern. I just used a barbie to make sure she would be able to sit in it properly. The throw pillows are made out of some extra flannel I had laying around. The chest on the floor was purchased from a craft store and spray painted, I figured she could use them for storage for all the little barbie parts.
A view of the other end of the living room. The lounge chair came with my online acquisition, the stool/end table was another piece from Emily's Barbie collection. and the silver stool is another decorative gift box, untouched.
Barbie's bed was made out of a cereal box, duct tape and 4 pencils for the bed posts.

 I whipped up the blanket and pillow with fabric scraps.

The baby bed was another unfinished wood piece that I got at a craft store, spray painted and made some bedding for it, with scraps.
And the last furniture piece I "created" was this shelving unit. It's a simple bead storage box, lid removed and spray painted.
And... the big reveal! She was thrilled! She has been playing with it non stop and keeps telling me thank you for making it.

And that's it! I easily spent under $40 on the whole project. Way cheaper than Barbie's Dream House. When I was little I used the bottom two shelves of my bookcase for my Barbie's house. It wasn't nearly as fancy as this, but I had had endless hours of fun playing with it. I hope has as much fun playing with it as I did making it!

Friday, December 20, 2013

Toddler Sensory Book

This next project was inspired by Pinterest! (Seriously, where would I be without Pinterest!?)

I came across a pin for a sensory book. That pin inspired a google search from one end of the internet to the other to inspire all of the pages of this book. The one thing I didn't find was a good, tutorial on how to assemble the actual book. So, of course, I was determined to make one!

So here it is:

I would say this project was a success. I'm very happy with the final product. It took me WAY longer than I thought it would. I started before Halloween to ensure I would have it done by Christmas.  Once I started I spent every spare moment on it, and it still took me 2 weeks to finish! So be warned, this is addicting and time consuming! But my 10, 7 and 2 year olds were fighting over it, so it's worth it! Enjoy!

I got 1/3 yard of 5 coordinating cotton fabrics.
 Zippers, buttons, Buckles, Eyelets, Ric Rac, Ribbons... Anything goes! I tried to use as many different textures and materials as I could to delight the little ones senses! :)
 For Every four pages you want, you will need two pieces of 10"X20" fabric. I originally wanted 12 pages, but later scaled back to 8 because I wanted to finish by Christmas! :)
 Iron the fabric, fold it in half and iron it so you know where the page will end.
Two pieces of fabric will be 4 pages
You will want to sew the activities onto each page before you put the pages and the book together. So when you are assembling on specific page, you will only be working with one piece of fabric. Once you have all the designs put together, then you can make a book!

Let's start with the Bead Counting Page:
 The middle two pages will be on the same piece of fabric. So this design will be a two page spread. Think of book bindings!
 I divided up the space I wanted to fill by 10 and made marks along the top and bottom for where to place the ribbons. These marks were made about 1.5" from the top/bottom. (The stripes on this fabric were a life saver, I ended up marking on every 6th stripe instead of measuring, which helped it come out perfectly!)
 Find your desired beads
 Spend way too much time finding the exact right amount of right colors...
Only to discover that you had an ENTIRE bag of red beads lying right next to you the WHOLE time!!! Too late, I put in the effort, I was using the colorful beads!
I cut ten pieces of 1/8" ribbon, I cut them 8 " each, the gap is about 7" but I wanted to have ribbon to hold on to when sewing it down.
Carefully sew each piece in place on the fabric.

 After the top is attached, one by one, add the beads and attach the bottom of the ribbon.


 All attached! Trim off all the extra ribbon (once you've made sure you put the right amount on beads on each ribbon! I'm not speaking from experience here at all!!).

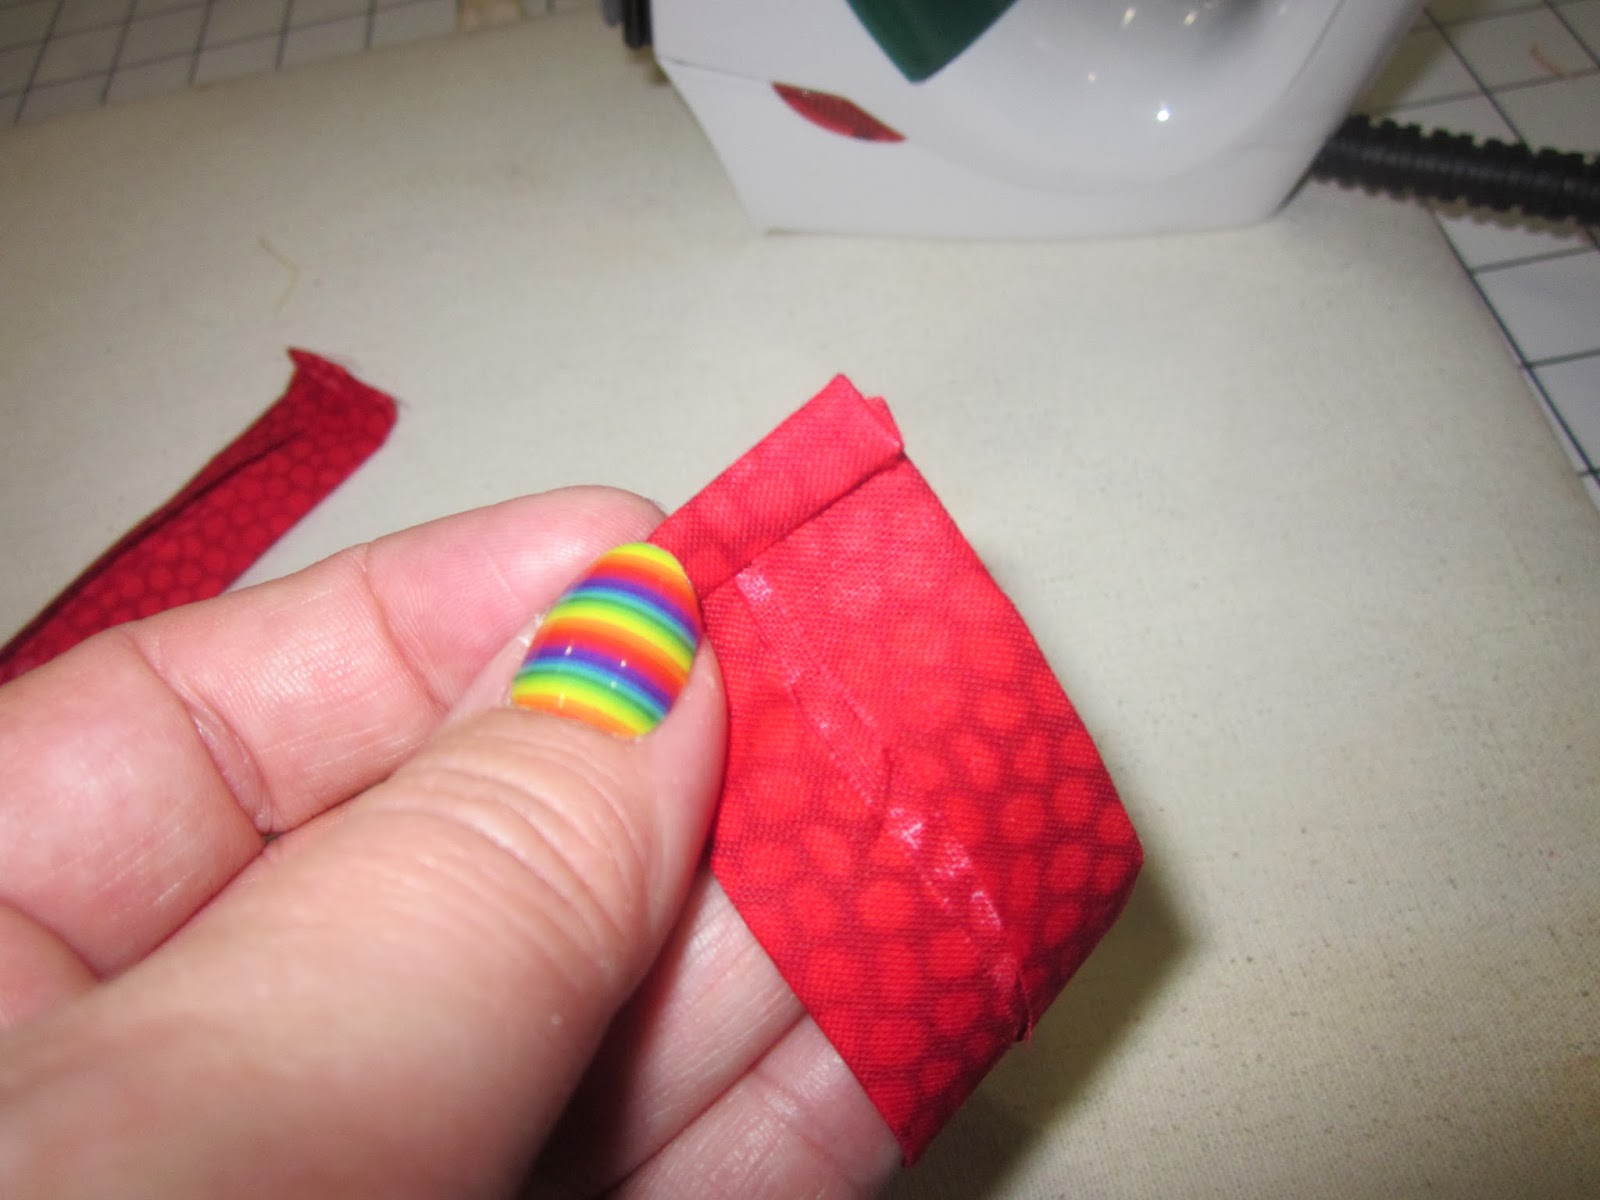
 Now to make a strip of fabric to cover up the ends of the ribbon. Cut two strips of 18"X 3" fabric
 Iron the fabric in half lengthwise. This is just so you know where the center is.
 Now unfold it and fold each edge into the center line and iron.


 Now fold each end over, and then over again to prevent fraying.
 Now find the center of the strip of fabric and line that up with the center of the page. Pin in place.
 Sew in place! Do the same for the top and you have 2 pages done!

On to the Owl Nest:
 Draw an owl shape and cut it out of felt. Cut out two circles and a triangle. Sew down the triangle, then the eyes. I made the eyes overlap the beak, and each other, just a tiny bit. Color the black into the eyes with a Sharpie.
Cut out ribbon for the wings and feet
Since I'm making mine with felt I can sew from the outside and not have to worry about turning it inside out and top stitching. If you elect to use a different material that will fray make sure you do this inside out. If you're using felt... carry on.
Pin together the two layers of felt, place ribbons for wings, feet, and the tether ribbon and pin them in place. 
 I forgot the tether ribbon so I had to go back and sew it in later. So don't do what I did, add it now, save yourself a little trouble!


Sew around the outside and leave a small portion open to insert stuffing. 
 I opted to stuff it with crinkly material. I searched high and low and found the perfect stuffing, the wrapping from my printer paper! Some people use plastic bags but I think thicker cellophane works best. Don't over stuff because you still have to sew it closed. Once stuffed sew it closed.
Now decide on the shape you want the nest to be.  I didn't put a lot of thought into this, just made sure it was deep enough to hold the Owl in place. I used a minky fabric for the nest. 
 Cut out the nest...
 Then sew down the tether ribbon.
 Then sew down the nest!

Snaps and Colors and Shapes, Oh MY!:
 Cut out 3 of each shape. I did these on felt, because I had it on hand, it doesn't fray, and it was the easiest. You can try it with whatever material you like. I opted for snaps, but in hindsight, I wish I would have used velcro. The snaps are a little bit too tricky for two year old coordination to master. So feel free to use velcro instead.
Put one part of the snap on cutout #1, and the other on cutout #2. Leave the third shape empty.
 Sew all of the cutout #1s onto the page.
 Sew Cutout #2 and #3 together with the snap facing out. Once they are all sewn you can snap them to the page with the coordinating shape.
Now put these two pages face to face, lay a layer of batting on top of that and pin it all into place. Sew around the edges, leaving an opening to turn it right side out. Once you've got the right side out, pin the opening closed, and top stitch along the edge. Four pages down!

Next up... Flowers and Buttons:
 Cut a long narrow strip to of the desired fabric for your flower. Depending on how long you  make it, the fuller the flower will be, the wider you make it the bigger the diameter will be. Mine was about 20"X3"
Fold and press the strip in half, lengthwise...
 Sew the two short ends together, this will form a cirle.
 Sew a loose basting stitch along the raw edge of the circle. Disclaimer: This was only my second attempt at basting.  I have not perfected basting and gathering yet. So I'll give you this link to learn basting and gathering if you need further explanation)

 Gather the material as much as possible.
 Once it's gathered, pin the edges together in the center. Mine ended up more oval shaped than circular because I used too much length, but I decided to go with it!
 In order to make the middle a little prettier I used the zigzag stitch, back and forth to secure the raw edges and hold the flower together.
 Thankfully I have a huge button to cover my mess-- err, I mean work :)

The second flower will have the button hole. I drew out a simple, five pedal, flower pattern on felt and put the button hole in the middle.

I was not able to get a good picture of the button hole making process. I will admit, I had to scour the internet to figure out how to make a button hole because this was my first button hole. I finally consulted the sewing  machines manual to figure it out because every tutorial I found online was different since all machines are different :) So my best advice... consult your manual, and practice, practice practice! I made about 5 attempts on scrap material before this I felt confident to try it on the real material.
 I used a thick, green silky ribbon for the grass. Little kids love rubbing silky stuff :)
 You can use any variation of ribbon and/or ric rac for the stems. Sew the stems in place first.
 The make a couple loops for the leaves on each stem. Sew them in place, making sure that they will end up above the "grass" once you sew the ribbon on.

 Sew the grass down, and sew the buttons in place!

Another first for me was learning to machine sew buttons! SOOO much easier!

Zipper Pocket:

If you can sew a zipper this page is the easiest of them all, if you can't... it's time to learn! It's really not as hard as you think.

The pages of the book are going to be about 9"X 9" so you'll wanted the pocket to be about 8"X 8". Cut two pieces of fabric 5"X 8.5" and sew the zipper in place.

Fold and press the edges in, pin it in place and sew in place!
 Lace and Tie:

 Cut two pieces of fabric 5"X 8.5"

Fold them in half, wrong sides together, you want to end up with two pieces that are 8"X 4" when it's all said and done.

Sew along the two short edges and turn the fabric right side out, top stitch around the two short edges, and the folded edge. (I'm not sure how I missed taking pictures of all of these steps!
Decide where you want the eyelets to go. Make marks and attach eyelets.
Lay the flaps, facing the wrong way, making sure that when you fold them to the center that they will be positioned right. Sew along the raw edge.

Fold the flaps into the center and sew up the folded edge. I sewed a rectangular shape to assure that the raw edge underneath is contained:


It should look something like this:
I still have to get a shoelace for tying!

Mitten and Buckle:

First off cut a mitten shape out of felt.

Cut a two strips of fabric a little longer than the width of the bottom of the mitten in length and double the size of the hole for the strap on your buckle, plus half an inch.

Fold the strips in half length wise, sew along the long edge leaving a 1/4 inch salvage. Turn the strip right side out, iron it flat. leave both short ends raw

 Put each strip through the buckle holes. Decide where you want the mitten to be, lay the edge of the strips right underneath the edge of the mitten, pin in place and sew.
 Pin the mitten in place, sew around the edge and secure the strap as well


Once all four pages are assembled, sew the two pieces of fabric together like you did the first two pages. You now have four pages assembled and ready to go! 

Cover:
For the cover I wanted it to be a little bit bigger than the book pages so I cut two pieces of fabric 21'X 10.5" 

I added an applique T to the cover for the recipients first initial. See applique tutorial.


 Line up the two pieces of fabric, wrong sides together. Sew around the outside, leaving a 10" opening on one of the edges.
 I used plastic canvas to make the cover stiffer. You can use felt, or batting, or whatever you like.

Cut the plastic canvas to fit inside the cover, accounting for top stitching. Mine ended up being 9"X 9"
Insert the plastic canvas into the cover, keep both pieces together for now.

Fold the edges of the opening in and pin them in place. Top stitch around the edge of the cover. Move the plastic canvas to the side that you are not sewing so it doesn't get in your way while you sew.

Once you've top stitched all the way around wiggle one of the pieces of plastic canvas to the other end.
Lay all of the pages down in order, and sew one seam right up the middle.

And that's all! Hours of fun! My 2 year old loves this book. His favorite pages are the shapes, and the zipper pouch. Remove the shapes, put them in the pouch, zip the pouch, unzip, pull the shapes out, snap shapes in place, repeat... over and over. This book also brought mastery of the buckle, which resulted in mastery of the buckle in the shopping carts at the grocery store... shopping is quite a trial now!

I hope you all enjoy making this as much as I did. Feel free to comment with any questions or suggestions, or share pictures of your own projects that were inspired by this post! I love the feedback! Also, be sure to follow me so you can stay up to date on any new projects!