Tuesday, May 27, 2014

DIY Firestarters

Some may call it cheating, but when you live in a brand new subdivision, in the middle of corn fields, you just can't gather the proper tinder, and kindling to start a one match fire! We have spend 30+ minutes trying to get our backyard bonfires started. Our go-to fire starter has been newspaper, but it burns up too quick. So after some research I came up with two solutions, one quick and easy one, and one that requires a little more planning, and works even better!

Option #1:

Stuff your dryer lint in a toilet paper roll
So simple, so easy! I stick the toilet paper rolls on top of the dryer as we empty them, then every time I empty the dryer vent I stuff it in one of the tubes. Double bonus that the rolls fit in an old dryer sheet box! 

These work great when your wood is really dry and it's not breezy at all. I use two to start a fire. Set up your wood, then light each tube and set it under the wood in your fire pit. These burn for about five minutes, and will easily start a fire in favorable conditions.

Option #2:
Egg Carton, dryer lint and wax:
These are even more amazing at starting fires because they burn for longer, the wax keeps the dryer lint from burning up so quickly. To make them use use an egg carton (not Styrofoam!) fill it with dryer lint, pack as much in there as you can. Then melt your wax, I use old Scentsy wax. 
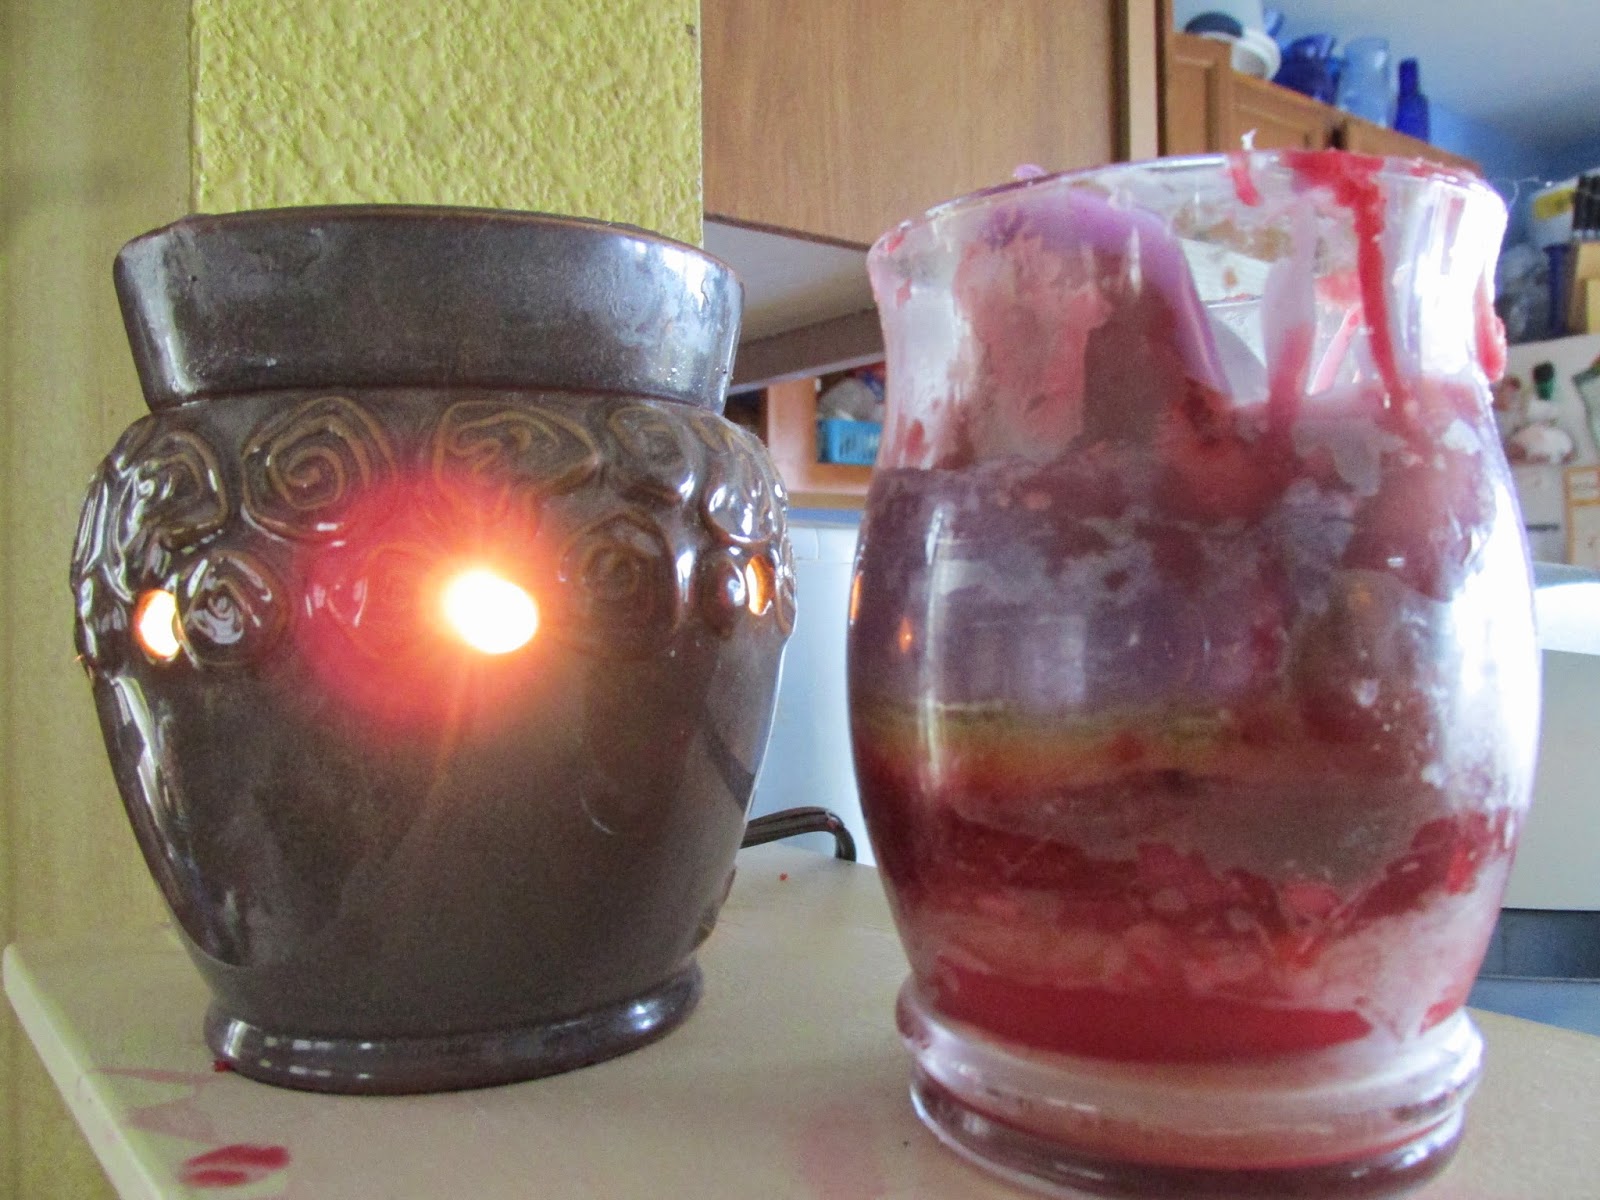
I pour old Scentsy wax into this glass container after it's lost its scent. Once it's full, I put it on a candle/cup warmer until it's all melted. Then I just fill the egg carton with wax and let it cool. Once it's cool each section will easily break off, leaving you with 12 fire starters!  

So how about a side by side comparison? 
One toilet paper tube, one wax egg carton piece:
Both light easily:
Toilet paper tube falls over and the the egg carton helps keep it ablaze, notice how much more flame the wax piece has!
5 minutes in: the toilet paper roll is done, wax piece is still going!
10 minutes in, still going... I'm getting bored now.... 
15 minutes, all done!

So for quick and easy, stuff the toilet paper tubes, for a super-duper, never fail, fire starter, make them with egg cartons. I use both because the toilet paper tubes are so easy, and I save the egg carton fire starters for when we're camping or trying to start a fire shortly after a rain, etc. Both are great options and have yet to fail me!


Tuesday, April 22, 2014

Custom Marble Magnets


These have been an addiction of mine lately! I can't seem to make enough of them, but I'm running out of refrigerator space to store them. So when Emily needed to come up with a product to sell in her 2nd grade economics sale, I knew right away what we would be making! These are fun to make, and the cost per magnet is only $0.19! (Yeah, we figured that out for the econ sale :) ) 

To start you will need: 
E6000 glue
Magnet buttons (found at Walmart)
Flat marbles 1/2" or 1"
Hole punch 1/2" or 1"
Popsicle stick
 

The marbles can be found at the Dollar store in 1/2" or 1" measurements.
 
 These hole punches cut the perfect size for the marbles. 
Now for the designs! Be creative, anything goes! I've used scrapbook paper, magazines, and printed up graphics. They all work. I've had some fun in Photoshop making designs and I discovered that Etsy.com has every graphic you could ever hope for in 1" round "bottle cap" image to purchase! 
If the paper you are using is thin you will want to put a layer of card stock in between the design and the magnet so that the magnet doesn't show through the paper. I print my designs on regular printer paper, then use the layer or card stock. I also use card stock with magazine pages, and most scrapbook paper. Yeah, now that I think about, I use card stock with most of the magnets I make!
Now to assemble:
Drop a gob of glue onto a piece of paper.
Get a little glue on your stick and spread it on the back of  the marble.
You don't want too much or too little, but err on the side of more. If you don't use enough glue there will be air bubble in the finished product.
You don't want too much or too little, but err on the side of more. If you don't use enough glue there will be air bubble in the finished product. 
 Now place the design onto the glue.
If you are using cardstock, apply glue to card stock and apply it to the back of the design. 
 Now you'll want to even out the glue and get rid of the air bubbles, or it will look like this!
Apply pressure to the back of the marble and watch the air bubbles spread out.
If any air bubble remain, smooth them out with your finger. 
 Let them dry for an hour or so, upside down, so they don't get stuck to the paper.
 After they are dry apply the magnets with a dab of glue. 
Allow the glue to dry for 24 hours before you hang them up. 
Now, try not to make to many, because I know you'll want to make ALL THE MAGNETS!! Just remember, your fridge is only so big... enjoy!!!

Monday, January 27, 2014

Thin Mint and Tagalong Sash tutorial

Sashes are great for the Thin Mints and Tagalongs costumes because their design is not as distinguishable at first sight. The other designs do well, design-wise, on their own, and I've found that the sashes take away from their design. I only make them for these two cookies, but it's up to you if you want one for each. 

To make the sash you will need:
White felt- you can get 8"X10" sheets at most craft stores, one sheet should be enough for the letters on one sash
Colored felt - 4"X 50" piece. I always have them cut 1/8 of a yard and it works perfectly
Glue - I use hot glue. I'm not sure what other glues would work for this.


First save the stencils above. You can make your own using Word or Photoshop if you like. It took some looking to find these online, so I figured I would save you all a step!

Print them all up. I use the Windows print and tell it print them 3.5 X 5", this will print 4 per page and they are the perfect size.

Cut out all the paper stencils, trace them onto the felt, cut the letters out of the felt.
 Line all the letters up on the sash.
 When gluing, leave the letters on the sash, pull up on piece of the letter, apply the glue, and affix it to the sash, then pull up the other side and do the same. I use hot glue here because it dries quick so I don't have to worry about the letters moving around while I wait for it to dry. Hot glue can get pretty messy though, I have a love/hate relationship with hot glue. If you only have a hate/hate relationship with hot glue, you can try using another type of glue. Every time I make a new sash I swear I'm using a different glue next time, but I keep coming back to hot glue :)

You can sew the sash directly to the front of the costume when you put it all together. Just place the sash on the front before you place the straps and the ribbons, then continue on with the assembly process.
Another option is to make it an actual sash. The letters for Tagalong take up too much room to be able to sew this sash on. Instead of changing the letter size I decided to make it a sash. Just Start the letters in the middle of the strip and sew the end in a diagonal line when you are done.