I got a Cricut for Christmas! After making vinyl decals for everything and everyone I could think of, I started to delve into other projects I could create with this amazing machine! It truly is a work of art all by itself! I found tutorials for etching glass with vinyl as the a stencil, I tried it and loved it.
Then my creative juices got flowing and I tried making stencils. After much trial and error I figured out stencils. So of course, why not combine the two projects and make vinyl stencils for glass etching!?
I take no credit for the actual tiara on glass project, that is not my original project, it's just being used to show the process.
First you will want to find a Tiara or crown silhouette online. I did a google search and found this one. It's important that it's one solid picture with no cut outs, the cut outs won't transfer to a stencil very well.
Upload the image to the Cricut design space, select and erase the background.
Save it as a cut image, select the image and insert it into the design space.
Resize the image to your desired size and hit Go.
Position the cut on the mat and hit Go
Turn the dial on the machine to Custom and select Stencil - 0.4 mm in the drop down list
(depending on your material this could take some trial and error to find the right setting)
The material I used was a plastic divider from the office supplies department at any store. I also had good luck with laminator sheets (heat sealed by itself). I tried thin cutting mat material but was not able to cut it without a deep cut blade. This material seems to work just fine so I didn't feel the need to run out and get a deep cut blade. If you try other material that works well for you, feel free to leave the suggestions in the comments. I always like to have options, the cheaper the better!
Stick the material on the cutting mat and cut your design
Bam! Instant stencil!
Using a dry erase marker, find the center of the mirror and stencil and make all the marks you need to apply it perfectly
Tape off any areas that won't be covered by the stencil. (I did this step now to act as a guide for laying down the stencil once it's sticky but you can do it after you apply the stencil as well.)
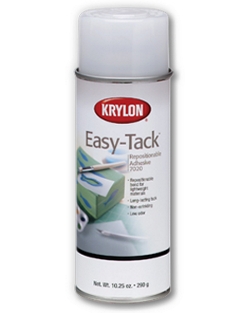
Now to make the stencil sticky so the etching compound won't bleed beyond the stencil. I wanted the stencil to stick to the surface, be easily removable, and reusable. Krylon Easy-Tack did exactly that! I didn't try any other products, so I can only vouch for this particular one for this project. Let me know if you use any others.
Take the stencil outside (or into a well ventilated area) and apply a coat of Krylon Easy-Tack. Allow it to dry for a few minutes. When it is tacky, but not wet, apply it to the mirror.
Then apply the etching compound (I won't go into detail here because there are plenty of tutorials out there on this process. No need to reinvent the wheel right?)
Once the glass is etched rinse the mirror off and clean the mirror with glass cleaner and you're done!
The stencil method is so much easier to remove than using vinyl and less wasteful because you can reuse the stencil after removal.
You can use these stencils for glass etching, painting, or whatever else you can think of! The Easy Tack keeps them sticky for several uses, and when it stops sticking you can reapply the Easy Tack for more uses.


