Showing posts with label cheap. Show all posts

Wednesday, January 13, 2016

DIY Make Your Own Reusable Stencil with a Cricut

I got a Cricut for Christmas! After making vinyl decals for everything and everyone I could think of, I started to delve into other projects I could create with this amazing machine! It truly is a work of art all by itself! I found tutorials for etching glass with vinyl as the a stencil, I tried it and loved it. 

Then my creative juices got flowing and I tried making stencils. After much trial and error I figured out stencils. So of course, why not combine the two projects and make vinyl stencils for glass etching!? 

I take no credit for the actual tiara on glass project, that is not my original project, it's just being used to show the process. 

First you will want to find a Tiara or crown silhouette online. I did a google search and found this one. It's important that it's one solid picture with no cut outs, the cut outs won't transfer to a stencil very well.

 Upload the image to the Cricut design space, select and erase the background.


Save it as a cut image, select the image and insert it into the design space.


Resize the image to your desired size and hit Go.


Position the cut on the mat and hit Go


Turn the dial on the machine to Custom and select Stencil - 0.4 mm in the drop down list 
(depending on your material this could take some trial and error to find the right setting)


The material I used was a plastic divider from the office supplies department at any store. I also had good luck with laminator sheets (heat sealed by itself). I tried thin cutting mat material but was not able to cut it without a deep cut blade. This material seems to work just fine so I didn't feel the need to run out and get a deep cut blade. If you try other material that works well for you, feel free to leave the suggestions in the comments. I always like to have options, the cheaper the better! 


Stick the material on the cutting mat and cut your design


Bam! Instant stencil!


Using a dry erase marker, find the center of the mirror and stencil and make all the marks you need to apply it perfectly


Tape off any areas that won't be covered by the stencil. (I did this step now to act as a guide for laying down the stencil once it's sticky but you can do it after you apply the stencil as well.)
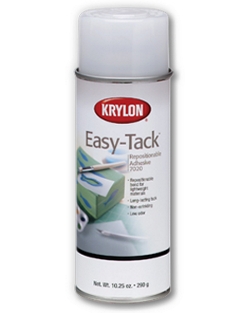


Now to make the stencil sticky so the etching compound won't bleed beyond the stencil. I wanted the stencil to stick to the surface, be easily removable, and reusable. Krylon Easy-Tack did exactly that! I didn't try any other products, so I can only vouch for this particular one for this project. Let me know if you use any others.  


Take the stencil outside (or into a well ventilated area) and apply a coat of Krylon Easy-Tack. Allow it to dry for a few minutes. When it is tacky, but not wet, apply it to the mirror. 


Then apply the etching compound (I won't go into detail here because there are plenty of tutorials out there on this process. No need to reinvent the wheel right?)


Once the glass is etched rinse the mirror off and clean the mirror with glass cleaner and you're done! 


The stencil method is so much easier to remove than using vinyl and less wasteful because you can reuse the stencil after removal. 
You can use these stencils for glass etching, painting, or whatever else you can think of! The Easy Tack keeps them sticky for several uses, and when it stops sticking you can reapply the Easy Tack for more uses. 


Wednesday, December 16, 2015

Fun, Easy, 20 Minute Pillow Tutorial!

I have come into a large stash of 27" squares of upholstery samples. This is a pretty decent size piece of fabric, but not really enough for one pillow and if you use two pieces, one for each side of the pillow, it leaves a lot of waste. So I figured out this super simple method to make one piece of 27" square fabric into a 15" pillow.


My fabric samples are discontinued upholstery samples, but you can use just about any fabric that you want, in varying sizes as well. This tutorial is meant to show you how to turn a large square of fabric into a pillow, with very minimal waste.


Start with your fabric, right side up. My fabric is 27" by 27" 


Fold all of the corners into the center, to meet at the center. 


Sew along each of the 4 sides, leaving half of the last seam open for stuffing. 

You could potentially stop here, turn it right side out, stuff it and close it. But I wanted mine to have more dimension, so I took it a step further. 


Fold each corner flat (think the opposite of how it will be when the pillow is finished). Mark a triangle that is 2" high and 4" wide on the corner with a fabric marker/pencil/chalk. 


Sew along that line and clip the corner off.


It should look like this. 


Turn it right side out..


And stuff it!


*This is where I took a break and waited patiently for Amazon to deliver my stuffing and forgot to take a picture when I finished up the other pillow.*

Once you have the pillow stuffed, close the seams with pins and close up the seam with the blind stitch (or whatever you choose to call it). 


These pillows look great with the seams up front, 


Or in the back! 

I love this pillow design! With all of the funky, trendy fabric samples, I've been making pillows for all my friends and family. It's a simple, easy and clean looking design. 


Saturday, July 18, 2015

Pallet Wood Canvas

Here is the tutorial for making a wood canvas for whatever wood art you want. I use fence panels that have been "weathered" in my back yard for years. But you could easily use pallets for this as well. 


Decide on your dimensions and cut your pieces accordingly. I always cut two supports just and little bit narrower than the width of the canvas.


Wood Glue doesn't offer much support when it's wet, but I felt it would help keep it together once it dried. 


I measured depth of the board and doubled it and found nails that were just a hair shorter in length.  When hammered through the back it won't come through the front. No visible hardware. 


 I hammer in 4 nails for each board, and each overlap. That is a lot of nails, but it holds!


That's it! Sand it until the texture is to your liking, then be creative! 


Use eye hooks or drill holes and use twine to hang. Beautiful!


Thursday, December 26, 2013

Thrifty Crafting

I grew up with a thrifty Mom, so I come by my cheap -err- thriftiness naturally. We were taught how to save money on everything, cut corners, reuse, shop sales and clearance, you name it! As a kid, I despised it, I swore when I grew up I wouldn't be cheap. But as I grew up and had to spend my own, hard earned money, I realized that I worked hard for my money, so why would I not want to stretch it as far as I could? I'm a big couponer, I shop sales, our clothes are second hand, or straight off the clearance rack. Our budget is tight, but I make it work.

Even my craftiness is fueled by my desire to save money. When I see something cute, that is fairly simple to make, I think, "why would I pay for that when I can make it for half the price!?" My first craft project, as an adult, was making my own Boppy-style pillow. It was only a half success, but that opened the door for crafts galore.

When my daughter started growing hair, those little alligator clip hair bows became popular, being the thrifter that I am, I made her one in every color. I even made hundreds more and sold them at a local consignment store to recoup the cost of the supplies, and when those costs were recouped... I bought the kids clothes at the consignment store. For several years those bows kept my kids clothed!

So, after years of being thrifty and a crafter, I've come up with a list of hints to craft on a budget!

1. Know your prices. After spending some time in craft stores you start to know what prices are for the items you buy often. Don't be fooled by "sale" prices that aren't really deals. Also pay attention to price/yard. Sometimes, what seems like a good price for ribbon, may just be short, overpriced ribbon on a big spool.

2. Shop around. Before I go shopping I take a quick look online and see what I can find an item for online, I always consider the price of shipping as part of the price. Then I head to stores and try to beat that price. If there are several craft stores in your area, check out prices at all of them. As much as I dislike Walmart, they have a fairly good craft section, and they usually have better prices than some of the bigger craft stores.

3. Use COUPONS! Hobby Lobby, Michael's, and Jo Ann's all offer coupons on a regular basis, all 3 stores have apps for your smart phone, they also email and mail out coupons and offer coupons on their website. I never find myself lacking for coupons. Michael's and Jo Ann's will both accept competitors coupons, Hobby Lobby does not. Also, get familiar with each retailers coupon policy. For all stores, % off a single item coupons can not be used on sale or clearance items. Jo Ann's will allow you to use more than one coupon per transaction and they will also allow you to use a % off one item with a % off entire order. For this reason, among many others, Jo Ann's is my favorite, and my go-to store for most of my crafting needs.

Coupon Policies:
Micheal's
Jo Ann's
Hobby Lobby

4. Stock up when the price is right. If you find fabric for dirt cheap, but don't have a project for it: Buy it! If you are buying supplies for an project and you find a super deal, stock up! I don't know how many projects I've been able to complete without a trip to the store because I've stocked my craft room, slowly, over the past few years.

Also get familiar with the remnant/end of bolt bin at your craft store. When they come to the end of a bolt, if there is less than a yard left, they offer whats left at a super discount. Also if there is less than a yard left when they are cutting your material, ask them if you can buy it as a remnant.

5. Organize. Stocking up does you no good if you aren't organized. If you can't find the supplies you have stocked up, then they will be useless. I am lucky enough to have a designated craft space. I call it my craft room, but really it's just a corner of the basement that has been partitioned off, just for me. I have lots of shelves, bins, baskets, containers, labels etc.... I try hard to stay organized, but I often have several crafts going on at once and I find myself in the middle of a mess, searching for one specific item.

If you don't have a designated space for crafting, buy a few big plastic bins, keep your supplies organized in there. I spent several years crafting like this. Whenever I had the urge to craft I would pull the bins out and everything would be in one spot, right at my fingertips.

6. Save your scraps. I have a scrap drawer. Anything over 5" X 5" or something similar in measurement gets put in there. I find they come in handy a lot.

7. Up-cycle. I save old clothes, towels, sheets, t shirts, knits, button down dress shirts, etc. If they have minor flaws that make them unwearable or unusable there is still a lot of valuable material that can be used for other projects. There are a lot of good tutorials online for ways to up-cycle old clothes.

8. Use the internet. Do extensive internet searches for every project. Even if you don't find exactly what you are looking for, you'll find several different ideas to help you come up with the most efficient method for your project. Most of my projects are a combination of several different online ideas.

Those are my tips! If you have any to add feel free to leave a comment below!

Monday, December 23, 2013

From Bookcase to Barbie house!

I wanted nothing more than to give Emily a Barbie Dreamhouse for Christmas. But even that one present would have exceeded our Christmas budget for her. So I got creative!

She had this bookcase in her room, the shelves were heaped with junk. She took little care in keeping the shelves organized and they were just a mess. One day I went on a pretend rampage, and emptied the shelves off, organizing the "junk" into piles to keep, put away, throw away etc... When I was done, she no longer needed the shelves, so I took them down to the basement and got to work!

This was an ongoing project that spanned several months, but I'm IN LOVE with the results!

This was a super old, pressed board book shelf. We got it used, 10+ years ago. It was still sturdy, but  really ugly! I gave the exterior a good sanding and a couple coats of spray paint primer. Then I gave it another couple coats of "mocha" colored chalkboard paint.


I used scrapbook paper for the wall paper and mod podge to apply it. The flooring is faux wood linoleum squares, purchased from Home Depot. for flooring and wallpaper: $7.80!
The window is also scrapbook paper, cardstock trim, with fabric and ribbon hot glued for the curtains. You can see the "chair rail" in the back is simple ribbon as well.
I picked up this decorative mirror at Dollar Tree and glued fur around it. Notice the "crown molding" on the top! (only this level got crown molding, the other levels were too uneven)
The TV and fireplace were printed up, cut out and mod-podged right onto the wall. The area rug was some silky, furry, fabric I had. I cut out a square, did a zig zag stitch around the edges to keep it from fraying/shedding, then hot glued anti skid rug underlay to the bottom. The clock is another modge-podge job. I found a wood pendant at a craft store, spray painted it, and modge-podged it on. You can't tell in this picture, but I also Photoshopped Emily's name onto the clock face before I printed it up.

Once it was all assembled it was time for the fun part... Decorating!
 I think I love the table the most! It was a decorative mirror, glued to a candlestick holder, both from Dollar Tree! $2 Barbie table! The stools are made from decorative gift boxes, also from the dollar tree. I "upholstered" the top and duct taped the bottom. The bench in the back was confiscated from Emily's Barbie collection.
I sat and waited for weeks for inspiration to hit me for how to make a kitchen.... finally it hit me! Someone was selling a bunch of used Barbie furniture online for $10, Kitchen and Fridge included! I was not at all disappointed to not have to make my own!
 The sectional couch was made out of duct tape and cereal boxes. I didn't really follow any type of pattern. I just used a barbie to make sure she would be able to sit in it properly. The throw pillows are made out of some extra flannel I had laying around. The chest on the floor was purchased from a craft store and spray painted, I figured she could use them for storage for all the little barbie parts.
A view of the other end of the living room. The lounge chair came with my online acquisition, the stool/end table was another piece from Emily's Barbie collection. and the silver stool is another decorative gift box, untouched.
Barbie's bed was made out of a cereal box, duct tape and 4 pencils for the bed posts.

 I whipped up the blanket and pillow with fabric scraps.

The baby bed was another unfinished wood piece that I got at a craft store, spray painted and made some bedding for it, with scraps.
And the last furniture piece I "created" was this shelving unit. It's a simple bead storage box, lid removed and spray painted.
And... the big reveal! She was thrilled! She has been playing with it non stop and keeps telling me thank you for making it.

And that's it! I easily spent under $40 on the whole project. Way cheaper than Barbie's Dream House. When I was little I used the bottom two shelves of my bookcase for my Barbie's house. It wasn't nearly as fancy as this, but I had had endless hours of fun playing with it. I hope has as much fun playing with it as I did making it!