Showing posts with label organizer. Show all posts

Tuesday, August 11, 2015

Simple and Easy DIY Jewelry Hanger

As my jewelry obsession grows, my storage needs grow as well. I was putting hooks directly in the wall, but everytime I put another hook in the wall, I felt a little more guilty for putting another hole in the wall. So I came up with this project in my never ending attempt to re-purpose all our fence panels. 


I started with a piece of old fence paneling. I sanded it, painted it and then sanding off a little of the paint to make it look "rustic". 


I marked 2 rows for hooks, spaced every 2 inches, and staggered from one row to the next. I drilled pilot holes with a 1/16" drill bit to make it easier to get the hooks in. 


Then screw in all the hooks! I used vice grips to save my fingers from the screws. I added eye hooks on the top for hanging (not pictured).


After haning all my jewelry I realized that I should have made it bigger because I am out of hooks. 


Monday, September 9, 2013

Manicure Kit Rollup

I wanted to come up with cute packaging for the $1 manicure set I got to use as a giveaway at my Jamberry Nails parties. I looked into several different options from buying little gift bags to ribbons before I was finally inspired by the crayon rolls I've been seeing all over pinterest. If they work for crayons surely they can work for manicure tools! 

With little more than an idea I headed to my craft room to see what I could whip up. The first one was a mess, but it was functional. And, I have to say, each new one I make keeps getting better. So I thought I would share my design to, hopefully, help others avoid the trial and error that I have gone through!

All you will need for this project is some scrap fabric and coordinating ribbon

 First you start off with two piece of fabric cut to 9"X12" (you can adjust size as you like, this is just the size that worked best for me.)
Line up fabric, with the right sides together. Sew all around the outside, leaving a 1/4" seam allowance, leave an opening of about 2-3 inches to turn the fabric right side out.
 Turn the fabric right side out. At this point I iron the loose fabric at the opening. Fold it inside so that when sewn the sides will be straight and even, run an iron over it to make sure it stays put while sewing. Make sure the opening is along the edge that will be the top of the roll.
 Now from the bottom fold up about 3" of fabric. This will make the roll between 5-6" from top to bottom.

 On one of the ends (I always use the left end) take an 18" length of ribbon, folded in half, and pin it along the edge with the fold inbetween the two pieces of fabric. This should leave two loose ends, about 9" long, to tie the roll when you are done.
 Now sew all the way around the perimeter of the fabric. I try to get as close to the edge as I can and still sew a straight line. Make sure you are closing up the opening along the top and attaching the ribbon with this seam.
 After you've sewn around all that is left is to sew the vertical lines to hold the tools. I like to sew a variety of widths, I don't use any specific measurement, I have been known to eye ball with the tools on the fabric before sewing, but I've found that as long as you don't make the slots too big it doesn't really matter. I do make a few narrow slots to hold cuticle pushers.

There are two ways to make the vertical lines. You can either start at the bottom, sew up and cut the thread for each line. (I didn't like that option because I hate having so many cut threads, too much potential to unravel) or you can start along the bottom seam, sew along the seam, pivot, sew up to the top of the pocket, pivot, come back down the same seam you just sewed, pivot, sew along the bottom seam to the next vertical line you want to sew, pivot, sew up... etc.. I tried to take pictures of this process but they really didn't explain anything, it really needs a video. I'll work on that when I make the next one.
 And then... You're done!!! Add your manicure supplies...
And roll it up!
This hold everything you need to do a manicure and tucks away nicely when not in use. 

Monday, March 11, 2013

The Ultimate Hair Accessory Organizer Tutorial

 If you have a girl you know that hair accessories are addictive. Before you know it that little container that you use to hold your hair bows and such is overflowing, then you have two... and searching through those containers is a pain! Early on I made a bow holder with ribbons but that only held barrettes and clips. I needed more! So I combined several ideas and came up with the ULTIMATE hair accessory organizer! Now if I can just get my 7 year old to stop taking her hair things out of her hair and losing them at school...

This is perfect for clipping barrettes and clips to the ribbons, storing headbands on the loops at the bottom and hanging hair ties and other accessories on the hooks on the side. It's quite simple to make!

What you will need:
Canvas whatever size you like
Acrylic paint for the canvas
Ribbon 3 yards of 5/8" or more depending on size of canvas
7/8" cup hooks
Staple Gun

Start by painting the canvas. It takes a couple coats. You can add designs or get a little more creative with it if you choose :)


Once it's dry flip it over and mark the center point on the long edge. From the center mark out equal distances. This will vary depending on your canvas size. Mine was 18" X 14" so my center was at 9" and each mark was 3" and 6" from the center.  


Next step: Simply staple the ribbon at the marks, make sure that you look at the front of the canvas and make sure it is straight before you staple the second end. Cut the ribbon, heat seal it, and move on the the next. Once you have the board done it's time to move on to the headband holder.


I had one 3 yard spool of this ribbon and this was all I had left to work with after covering the canvas. In the future I will make sure I have more ribbon to make more loops. I used a thicker coordinating ribbon to sew the 5/8" ribbon to. I had 3-8.5"cuts of dragonfly ribbon and I cut 3 - 7" cuts of thicker ribbon. 


Fold the wider ribbon lengthwise so you know where the middle is, make a mark every 2 inches. On the smaller ribbon  make a mark every 2.5 inches. 


Line up the edges of the two ribbons and sew right along the edge. Then, match up the marks on the two ribbons and sew creating the loops. Do this for the rest of the ribbon. (The loops will be less wavy and hang down more with headbands in them.) I used the sewing machine for this step because it's neater, I imagine you can hand sew or use the glue gun if you want.


This is a close up of the stitching. 


Now you want to cover up the stitching at the bottom. I used a matching 3/8" ribbon and hot glued it around the bottom. 


So this is one way to make the headband holder. You can also use this headband holder design without the D ring and a little bit shorter. You can add more headband ribbons to the bottom. The possibilities are endless. 


Attach the ribbons to the back of the canvas.


Then use about 12" of ribbon to attach to the top for hanging.


Then add hooks to the edge for hanging hair ties and you are done!

Here is another holder with more design on the canvas.


Ribbon Headband and Bow Holder/Organizer Tutorial


I've been making so many bows and headbands lately that we needed somewhere to store them! I saw a similar headband holder to this on Pinterest but I couldn't find a tutorial so I figured it out for myself and thought I would share the tutorial since there doesn't seem to be one out there.

What you will need:
D Rings (can be bought at any craft store)
Ribbon - roughly 3 yards, I like to use 7/8" ribbon, make sure d clip is the right width for the ribbon you choose
Sewing machine or needle and thread
Embellishment or coordinating ribbon
Hot Glue gun

To start you will need to attach your D ring to the ribbon:

Heat seal the end of the ribbon. Fold the end down approx 1/4". 


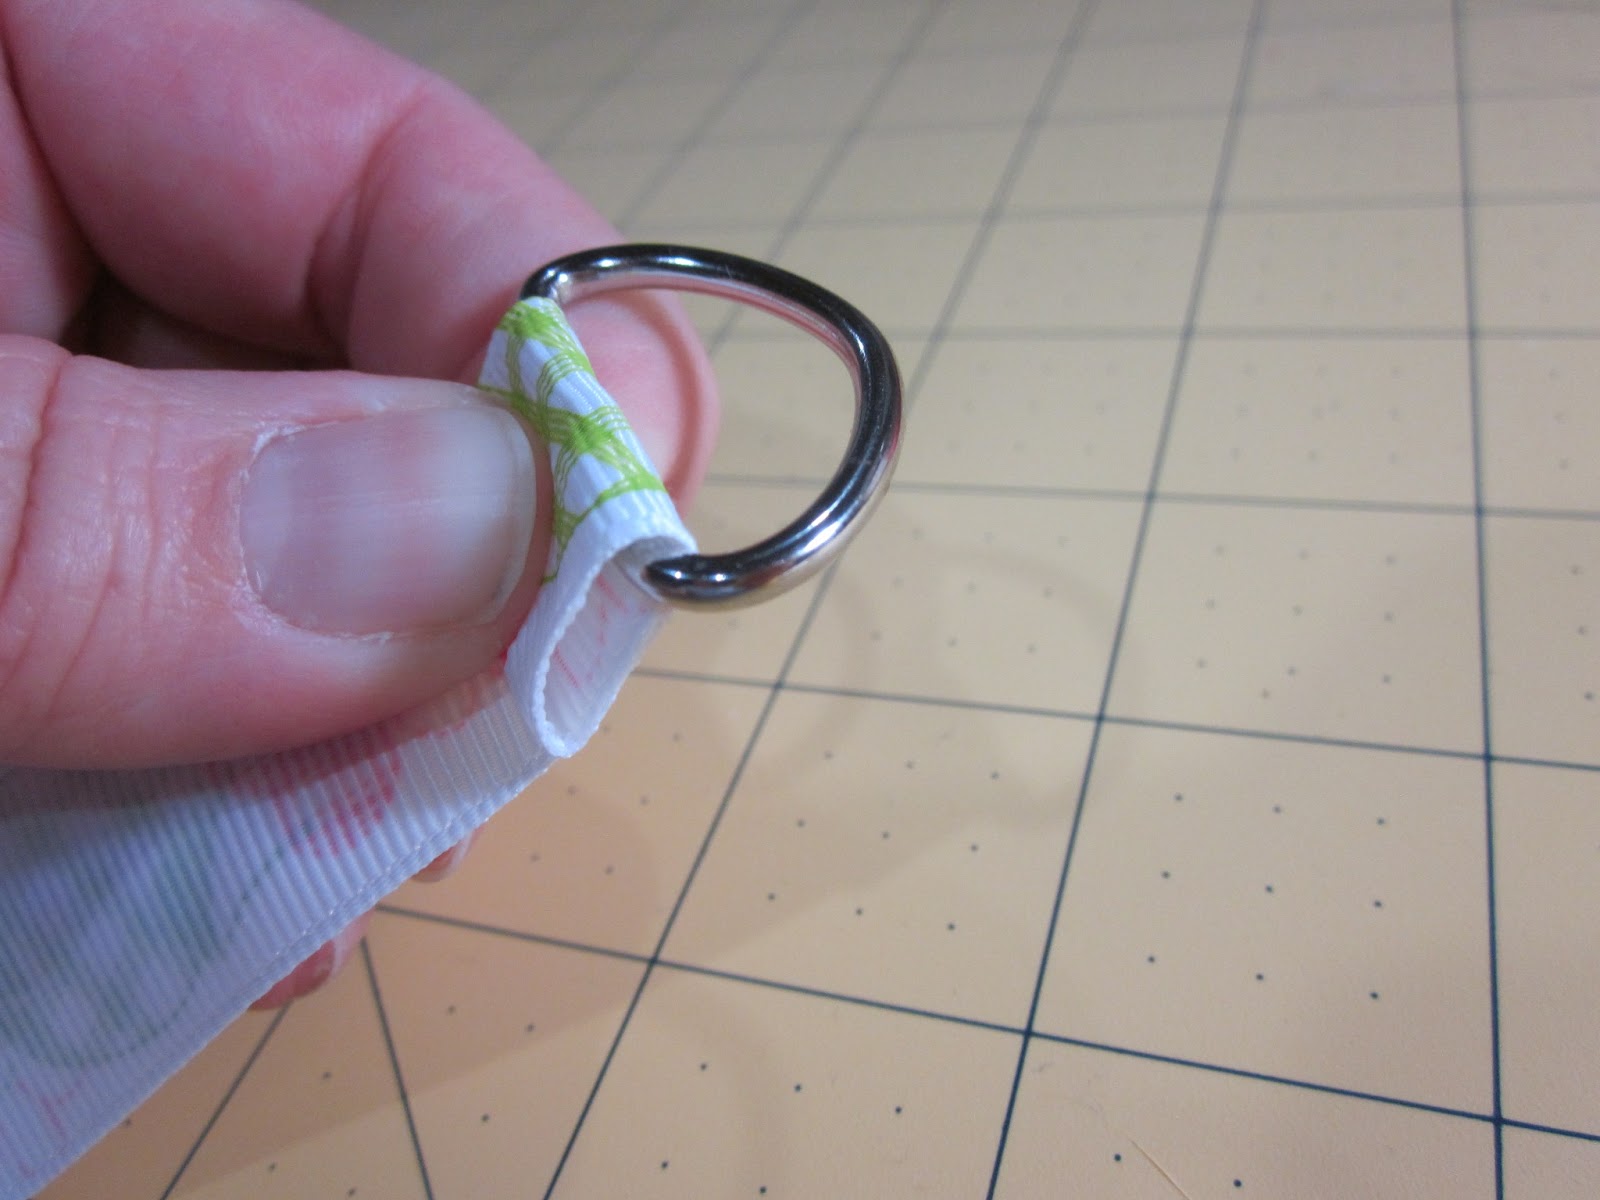
Put the ribbon through the D ring and fold it over. 


Sew across the ribbon. I sew back and forth several times so that it's secure. You can do all the sewing by hand, I prefer to use the sewing machine because my hand sewing is not the neatest. I imagine you can do this with hot glue as well, but I haven't tried it. I worried that hot glue would eventually give and the bow holder would be useless.


With a ruler mark every 3 inches all along the back of the ribbon. I use a fabric pencil but you can use just about anything. The marks will mostly be hidden once the holder is all made. Just make sure you don't use anything that will show through the ribbon.


Now, skip the first mark and take the second mark, fold it so that the right sides of the ribbon are facing each other, place that fold right below the first seam that you sewed to attach the D ring.


It will look like this once sewed.


Continue folding at the mark 6 inches from the bottom of the last loop. Sew the ribbon just above that mark. Make sure you're sewing past the mark so that the previous loop will hide the stitching when the holder is hanging up. Make sure the previous loop is out of the way when you sew. 

Continue doing this for every loop. (FYI - you won't use every mark on the ribbon, it's just easier to mark every 3 inches. So don't let the extra marks confuse you!)

Once you've run out of ribbon or decide it's long enough simply snip off the end of the ribbon after you've sewn the last loop. Heat seal the end so it doesn't fray.

Now it's time to hide the seams at the top of the holder! You can use any type of embellishment you want, buttons, bows, characters, or just a simple ribbon, it's up to you! I had ribbon in a coordinating color so I made a bow. 

Hot glue the bow to the top of holder right over the two seams and you are DONE! Headbands can slip into the loops and bows can clip onto the ribbon. Then, if you're anything like me, go make more because you realize this isn't nearly enough storage for the amount of headbands and bows your daughter has.

And if that's still not enough see my tutorial for the Ultimate hair accessory holder!