Saturday, July 18, 2015

Our refinished dining room table

We have a beautiful Amish Oak Dining room set. It was a fine set, structurally, but years of wear had taken it's toll on the finish. I wish I had thought to take a picture of the table before we started, but this is the only before shot I could find of the finish. Ick.


We started with the leaves, to make sure we weren't going to really screw it up. I was amazed how white the wood was after all of the sanding.


We learned a lot from the leaves and moved on to the actual table. Sanding and more sanding...


The stain we picked was pretty close to the original because we didn't need to refinish the base or the chairs. 


 1 layer of stain


 3 layers of stain


We added 3 layers of Glossy Polyurethane


And it came out Oh-So-Shiney! I am in love. The polyurethane really holds up to the kids abuse!

It took us several weeks because it requires a lot of waiting in between coats. Definitely not the easiest DIY project we've taken on, but not to bad. 


How to transfer designs onto any canvas, with no artistic talent.

I am have creative talent to spare, but artistic ability... not so much. I get so frustrated sometimes when I'm working on a project and it doesn't come out perfect because my artistic ability is lacking. So I stumbled on this technique a while ago and felt like the internet needs to know about it!


First, find the design that you want to put on your piece. Re-size it on the computer and print it out. I do most of my re-sizing in Paint, it will even print big images onto several pages so you aren't limited to an 8.5"x11" design.


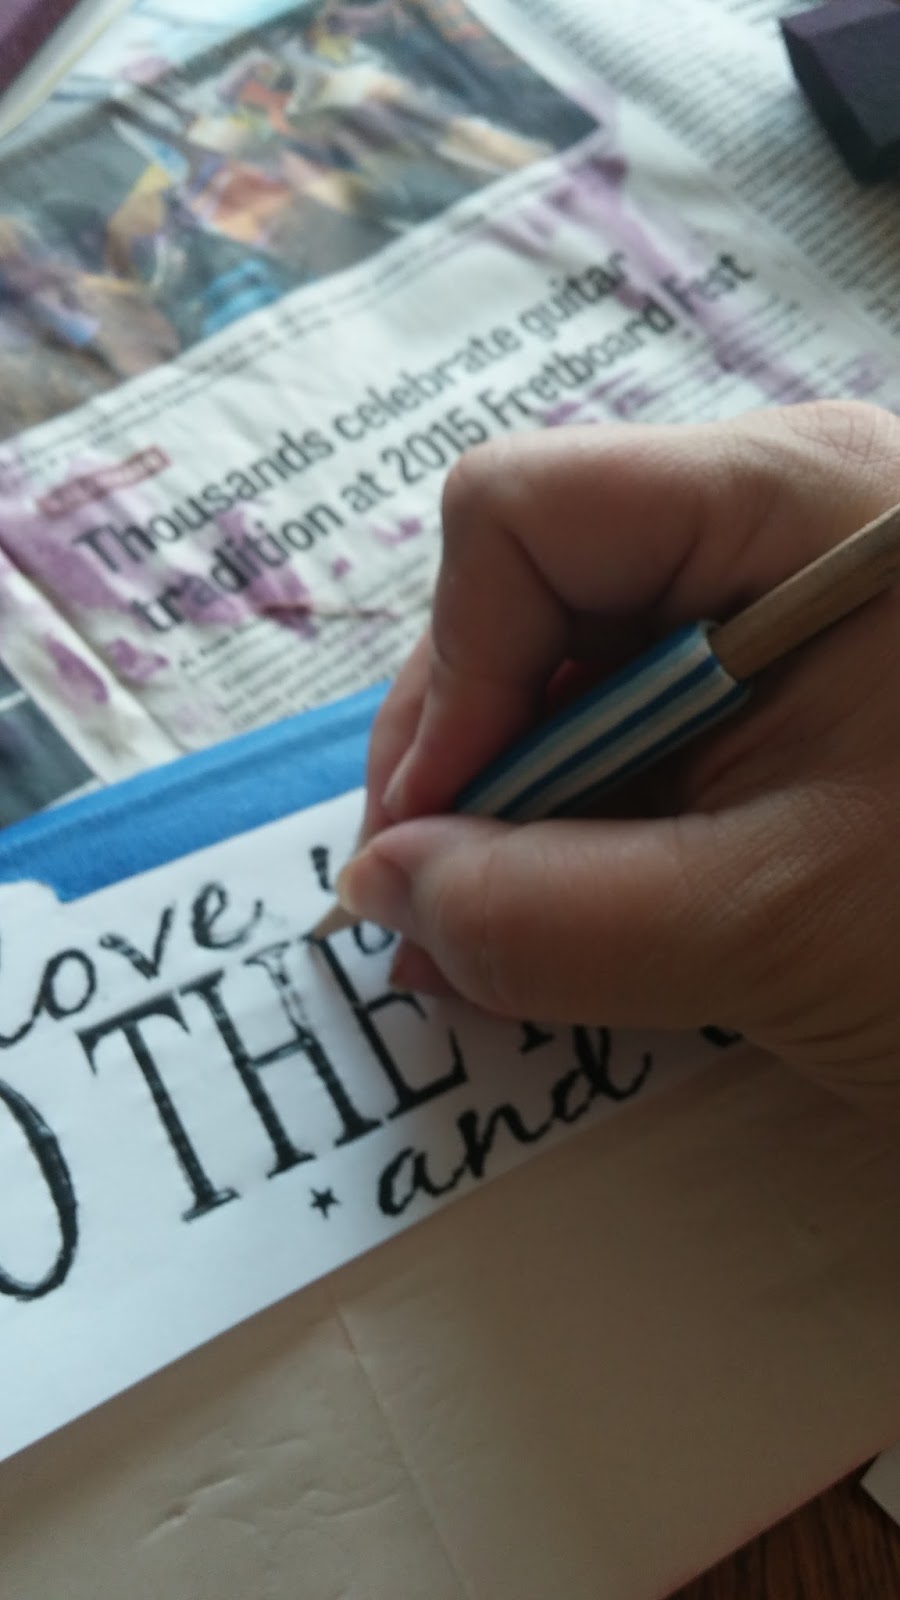
I didn't get a picture of the tracing paper, but you can purchase tracing paper in most craft stores. This is typically used for copying patterns onto fabric (at least that's what I remember using it for in 7th grade Home Ec. class). Place the tracing paper, color side down, on the wood, and place the design, right side up on top of that. Tape it down so it doesn't shift while you trace.


Trace the outline of the design.


After tracing is done, go over the design with your medium of choice. I generally use Sharpie, paint pen, or a fine paint brush. 


It's as easy as that, if you can trace, you can create!

Now go create: 


Pallet Wood Canvas

Here is the tutorial for making a wood canvas for whatever wood art you want. I use fence panels that have been "weathered" in my back yard for years. But you could easily use pallets for this as well. 


Decide on your dimensions and cut your pieces accordingly. I always cut two supports just and little bit narrower than the width of the canvas.


Wood Glue doesn't offer much support when it's wet, but I felt it would help keep it together once it dried. 


I measured depth of the board and doubled it and found nails that were just a hair shorter in length.  When hammered through the back it won't come through the front. No visible hardware. 


 I hammer in 4 nails for each board, and each overlap. That is a lot of nails, but it holds!


That's it! Sand it until the texture is to your liking, then be creative! 


Use eye hooks or drill holes and use twine to hang. Beautiful!


Wood Art

DIY Wood Art

With all of the Pallet projects floating around the internet I got inspired to do my own pallet art. We recently cut our 6ft privacy fence down to a 3ft fence along the back of our property line, because the corn field behind us isn't very nosey. I started crafting with the boards. Armed with a miter saw and a sander, I have been keeping very busy. I've made so much rustic wood art that I don't know what to do with it. Here are some of my creations.


This is our night time saying. I saw this once at a craft fair for $40, I loved it, but I was too cheap to buy it, but I did start saying it to the kids at bed time. 8 years later, I made my own sign $0, bam!

  
Teachers name plats - 2 easy 45 degree cuts and some paint


Smitten with the Mitten! Here are super easy tutorials on how to make the pallet "canvas" and transfer designs onto wood.


Rustic Americana Hanging


The letters didn't come out right, but I love the tree!


Love Birds 


Dandelion, it needs a whimsical saying in the empty spot, suggestions?


Welcome Sign, I need to hang this one!


I was practicing on this piece but I ended up loving the ragged wood


 Everyone loves this saying, I've made several.


I saw this in a shop, ran home and made it myself!


There you have it. I hope this offered some ideas and inspiration. Be sure to check out my post on wood art tutorials here and here. 

Sunday, February 1, 2015

Shamrock Hair Clip

When I can't find a tutorial for a craft I want to try, I'm forced to figure it out for myself. Which is fine, but it takes longer, and (sometimes) wastes material. So once I figure that craft out, I like to share a tutorial so everyone can benefit from my trial and error. I try not to repeat tutorials that have been done by someone else. No need to reinvent the wheel!

I found a picture of this shamrock hair clip on pinterest today. It was linked to an Etsy listing. Now, there are two types of people in this world, those who craft, and those who buy crafts. Crafters do not buy crafts because they can make everything themselves, and have fun learning how, right!? So I set out to learn how. 

Supplies:
3/8" grosgrain ribbon
Alligator clip
Lighter
Scissors
Hot Glue Gun
Jewel (optional)


Cut 6- 2 1/2" strips and one 4 1/4" strip to line the clip.
Make sure to heat seal the ends. 


You will work with 2 strips at a time. Take two strips and glue them together at a 90 degree angle. 


Take the strip on the bottom and flip it over, glue the end to the second ribbon, right next to the first end.


Now take the second ribbon, flip it over, weave it over, and under the first ribbon. Glue the end of the second ribbon on the underside of the first ribbon, right next to the other end of the second ribbon. 

Now make two more!


Glue one leaf to the alligator clip.


Glue the over leaves, overlapping a little bit in the middle. 

Add a jewel embellishment in the center if you like. 

And you're done! 

Tuesday, April 22, 2014

Custom Marble Magnets


These have been an addiction of mine lately! I can't seem to make enough of them, but I'm running out of refrigerator space to store them. So when Emily needed to come up with a product to sell in her 2nd grade economics sale, I knew right away what we would be making! These are fun to make, and the cost per magnet is only $0.19! (Yeah, we figured that out for the econ sale :) ) 

To start you will need: 
E6000 glue
Magnet buttons (found at Walmart)
Flat marbles 1/2" or 1"
Hole punch 1/2" or 1"
Popsicle stick
 

The marbles can be found at the Dollar store in 1/2" or 1" measurements.
 
 These hole punches cut the perfect size for the marbles. 
Now for the designs! Be creative, anything goes! I've used scrapbook paper, magazines, and printed up graphics. They all work. I've had some fun in Photoshop making designs and I discovered that Etsy.com has every graphic you could ever hope for in 1" round "bottle cap" image to purchase! 
If the paper you are using is thin you will want to put a layer of card stock in between the design and the magnet so that the magnet doesn't show through the paper. I print my designs on regular printer paper, then use the layer or card stock. I also use card stock with magazine pages, and most scrapbook paper. Yeah, now that I think about, I use card stock with most of the magnets I make!
Now to assemble:
Drop a gob of glue onto a piece of paper.
Get a little glue on your stick and spread it on the back of  the marble.
You don't want too much or too little, but err on the side of more. If you don't use enough glue there will be air bubble in the finished product.
You don't want too much or too little, but err on the side of more. If you don't use enough glue there will be air bubble in the finished product. 
 Now place the design onto the glue.
If you are using cardstock, apply glue to card stock and apply it to the back of the design. 
 Now you'll want to even out the glue and get rid of the air bubbles, or it will look like this!
Apply pressure to the back of the marble and watch the air bubbles spread out.
If any air bubble remain, smooth them out with your finger. 
 Let them dry for an hour or so, upside down, so they don't get stuck to the paper.
 After they are dry apply the magnets with a dab of glue. 
Allow the glue to dry for 24 hours before you hang them up. 
Now, try not to make to many, because I know you'll want to make ALL THE MAGNETS!! Just remember, your fridge is only so big... enjoy!!!